This post refers to the 2011 YouTube channel layout. It is now outdated.
“Create YouTube Partner Click able Image Map Banner”… that’s quite a complicated title. But it also was quite a challenge to figure out how to create that cool top banner with buttons that YouTube Partners can have displayed on their channels.
With the help of lots of online research, trial + error, tips from another YouTuber Alessandro aka ShooterHatesYou and web designer Brent Lagerman of MimoYMima – and probably most importantly the website http://www.maschek.hu/imagemap/imgmap, I managed to put it all together and I now have a functioning click-able banner on my In A Berlin Minute Channel with links to this blog and other sites.
To save other html-unsavvy YouTube partners some time, I figured I’d put together a quick tutorial of all the steps (including the important ones at the very end that deal with YouTube specifically, which other tutorials left out).
If you’re not a YouTube Partner, you cannot have such a banner on your channel. But you might be able to use this tutorial to create active images for something else.
(A little side note: if the sample images below are too small for you, click on them and they will enlarge in another window.)
To create a click-able banner for your YouTube Partner channel you need two things: an image you want to use as the banner and the map that will make the banner “click-able”.
1. Create a picture file of what you want your banner to look like – including any buttons you want. You will need software like Photoshop or Gimp to create this image. Remember that for the YouTube banner the image cannot be bigger than 150 x 960 pixels. The file format I used is .png.
2. Go to: http://www.maschek.hu/imagemap/imgmap

3. In the window for “Use an image on your computer” point to the picture file you created in step 1. Click “upload”.

4. Click on “accept” next to the name of the uploaded file. The image I uploaded is called: MIN_YT_Banner. Your image should now appear in the browser.

5. In the box “Image map areas” click on the + sign. It will add the interface for your first hot spot / click-able area / button.
6. Click on your image where you want the top left corner of your first hot spot to be activated – then drag the bottom right corner to where you want it to end. The coordinates will be noted automatically. The first hot spot I created was over the “Twitter button”.

7. Now enter the url that this hot spot / button is supposed to point to in the box labeled “Href:” next to the coordinates box. In my case the url is for http://www.twitter.com/luciwest.

8. You can now choose if you want a text to show up when people hover and if you want the link to open up a new window or a new tab or stay in the same window.
9. Repeat steps 6 – 8 for all your hot spots. Each time you have to click on the circle next to a new number. If they don’t show up automatically, click the + sign again.

10. After you’ve added all the hot spots and links, near the bottom of the page, below the word “Status” it should say “Ready”. If it doesn’t – you made some sort of error (possibly left something out). Now click on the word “Code” and your image map code should appear.
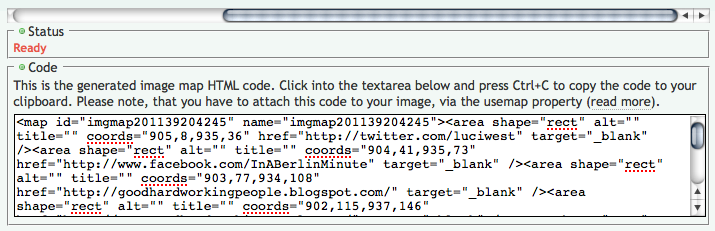
11. Before you copy and paste this code, you need add the information of what the picture is called so that the code can associate the map you just created with the image you will be uploading to YouTube. You will have to replace the name this program used for your image with the name YOU gave the image. This is the case for the “map id” and “the name” – both at the top of the code.
In my case the changes looked like this:
Before: map id=”imgmap20113920228″ name=”imgmap20113920228″
After: map id=”MIN_YT_Banner” name=”MIN_YT_Banner”
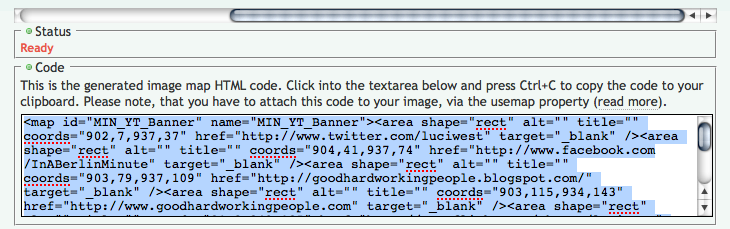
12. Select all text of the code and copy.
13. Go to your YouTube channel. Click on “Branding Options” in the top menu above your channel. If you do not have that option, you are probably not a partner and can’t do this.
14. Click on the “Banners and Image Maps” button.

15. In the box for “Channel Banner” browse again to the image you created in step 1.
16. In the box “Image Map Code” paste the code you just copied from the Image Map Editor. Again: make sure the name of your image is the same in the top box as well as the two times in the first line of code.

17. Hit “save” and “close” and possibly “refresh your page” and your new click-able banner should be there.

18. A little extra tip, in case it doesn’t show up: clear your cache (usually under history).